Wednesday, July 25, 2012

Itsy Bitsy Quilt Club Debuts. . .

The monthly Itsy Bitsy Quilt Club debuted today.  
The goal is to make an 8"x10" quilt with fabric scraps provided by BQE based on a technique that can be completed (or close to it) by the end of class.
 Today's class was built on the idea of being aware of the color wheel to create a stripped, raw edged quilt,
 with embellishments of couching and beading.
Each of us tried to work outside of our comfort zone.
Each of us progressed at our own pace.
And each of us put our own spin on interpretation.
And as with all art quilters, some interpretations are looser than others.
I felt happy with my ability to let go, not think too much, sew, embellish and get to the point of adding the binding.  I am going to use this class to learn to work more intuitively.  I'll keep you updated as to how it goes.


Blessings,
Karri


Tuesday, July 24, 2012

Spicy Spiral Table Runner Class. . .

Saturday we had our Spicy Spiral table runner class taught by Clara Clark.  
These are my fabric choices.
The pattern begins by cutting the fabric into strips and sewing them together.
Here are the fabric strips of the other students.
Once stripped, it is time to use the wedge ruler to cut.
As the wedges are cut, they get smaller and smaller to where it seems there won't be enough fabric to get all the sections out of it.  But, of course, there was.
And then the real fun begins:  sewing it together.  I loved watching the spiral happen.
Everyone's fabric selections were looking great as the sewing progressed.
And here's my spiral sewn and ready to quilt.
 I really enjoyed making the spiral and will definitely consider using this ruler to create other circular items.  It was great to have Clara leading us along the way as I would have been somewhat confused if I had only the pattern to go by.  I'll share again when the quilt it quilted and bound.


Blessings,
Karri


Thursday, July 12, 2012

Getting "My Whimsical Garden" Applique Block Ready for Stitching. . .

With my applique pieces cut, my brown background needs to be prepared.  This pattern calls for an approximately 12" square (better larger than smaller).  It will be cut down to 10 1/2" when stitching is complete.
To find the square's center, fold the square in half and finger press,
and then fold in half again and finger press.
When opened, the block's center is easily seen and I can begin arranging the applique pieces.
Arrangement begins with the largest applique piece first, the flower, and my applique pins (a must for this type of project).  Because I consider this a folk art piece, I choose to eye the block's arrangement rather than be concerned about exact arrangement (which would require tracing or a light box). Perfection is not an option :).
The flowers details are added.  I then place the bird and its details.  I am continually eyeing the placement diagram and the fabric folds for approximate placement.
The stem is next.  
When the leaves are added, the arrangement is complete and stitching can begin.  I searched my thread stash for the thinnest matching threads.  Black is generally a good choice for very dark fabrics if a match is not available.  I want the stitches to be as invisible as possible to allow my decorative stitches to pop.


Blessings,
Karri

Tuesday, July 10, 2012

"My Whimsical Garden" Applique Block Construction. . .

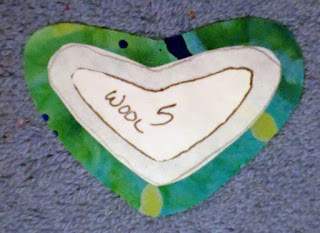
With my fabric pallet in hand, my next step for my applique block is to trace the pattern pieces onto freezer paper.  I made a note as to whether the pattern piece was going to be wool or cotton because the templates will be treated differently for each.
The templates for wool are rough cut around the outline and pressed onto the right side of the wool.
I then cut the template out on the line.  With wool I do not need an applique turn under allowance because it doesn't fray.
For cotton pieces, I also pressed the templates to the right side of the fabric but cut around the templates leaving an approximately 3/8" seam allowance.
This is now ready to applique.
The leaves are wool.  However, I am going to layer them on cotton.
To make the cotton template, I laid the original leaf template on another piece of freezer paper, pressed it, and traced around it, enlarging the pattern size.
I then pressed the new template onto the cotton fabric and cut it out adding a seam allowance.  I am now ready to pin to the background and begin stitching.  Keep watching and I'll demonstrate that next.


Blessings,
Karri


Monday, July 9, 2012

Free "My Whimsical Quilt Garden" Quilt Block by Piece O' Cake Designs. . .

This Friday is BQE's Twisted Fibers monthly workshop.  I will be demonstrating stitches I learned in the Sue Spargo class I attended in March.  Sue had us make this leaf sampler for class preparation to use to learn stitches.  The leaves can be laid out in any manner.  And this is a good type of sampler for students to make.
This is the drizzle stitch I learned.
And here is a beaded pekinese stitch.
There are three stitches on this leaf:  the closed fly stitch, the bullion stitch, and a chain stitch of some sort.  I will be demonstrating these and more on Friday.
But while visiting C&T Publishing's blog this weekend, I came across a fun one block project that would also work well for using as a stitch sampler, this FREE quilt block from Piece O' Cake's "My Whimsical Garden" quilt.  I own this pattern with 20 applique blocks and love the idea of doing it.   Now that one block is available that I can teach with, maybe just one will be enough by the time I do all the hand stitching.
I've decided to do mine with both wool and cotton.  Here is my fabric pallet.  Consider downloading this block to learn or practice some hand stitching on.  Be sure to combine various fabrics and get outside the cotton only rut us quilters often have.

Blessings,
Karri

Friday, July 6, 2012

Folded Log Cabin Class Today. . .

Today was the inaugural Bigfork Quilts, Etc. class:  Folded Log Cabin.  This is the second time I've taught this class and it's fun to do and to see the results.  The fabrics used and patterns created vary greatly from student to student.
This is the most colorful of the group.
And this block is going to be a part of an African theme.
Look at how the strip print pulls these blocks together.
These blocks are created from batik jelly roll strips cut down to 2 1/4".  Lots of texture and color variety!


If you decide to try this technique, I highly recommend "Folded Log Cabin Quilts" by Sarah Kaufman.  The gallery of quilts makes it worth the price of the book for inspiration alone.  I will pass along that trying the technique does take a little unconditioning of the quilter's way of piecing.  As one student put it, it's an upside down and inside out way of quilting (that's about what she said LOL).  Try something new and give yourself the opportunity to play with color to see what results you come up with.


Blessings,
Karri

Sunday, July 1, 2012

Bigfork Quilts, Etc.'s July Class Schedule. . .

The BQE July class schedule is published and ready for sign-ups.  
Thanks to the interest in the Folded Log Cabin class, it is being scheduled for a second time.
Clara Clark is teaching the Spicy Spiral Tablerunner and a great skill building class - the Lone Star.  
Watch for additional skill building classes beginning monthly in September.
A new art quilt class begins this month:  Itsy Bitsy Quilt Club.  Each month a new art quilt technique will be explored and incorporated into a quilt no larger than 8"x10".  Design elements will be discussed, opinions shared, and laughter by all. This month's technique is shared in Art Quilting Studio's Summer 2012 magazine by Caren Sacks.
The 2nd Friday of each month will be dedicated to Twisted Fibers, a handwork class.  I will share stitches I learned in Sue Spargo's workshop in March.


Hope you enjoy our classes.  I'll be sure to post class work as it happens so you can share in the fun and inspiration.


Blessings,
Karri